
Flowers
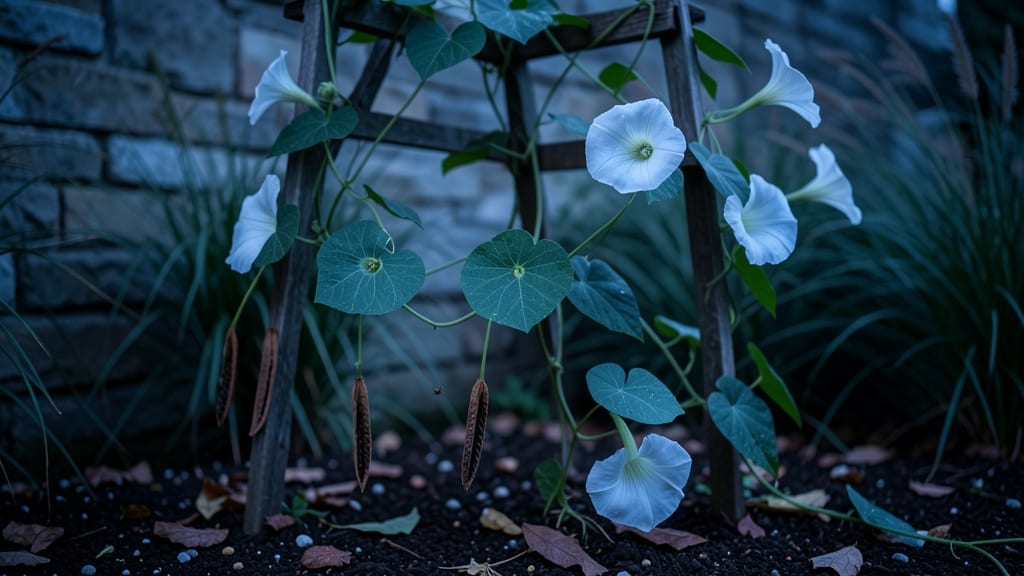
Moonflower seed pods hold the secret to growing these enchanting night-blooming vines—but only if you crack the cold-moist germination trick. 🌙 I’ve struggled with them for years, until I learned to mimic their natural tropical dormancy period by chilling damp seeds for 6-8 weeks.
Without this step, most seeds simply refuse to sprout, leaving you staring at a tray of stubborn soil. The process starts with harvesting mature pods (they’ll turn brown and papery) and extracting the flat, dark seeds inside.
Store them in a sealed bag with slightly damp paper towels and refrigerate—this mimics the rainy season timing their tropical cousins rely on. When you finally plant them in warm, well-draining soil, they’ll burst into life with 60-80% success rates if done right.
What you’ll end up with are fast-growing seedlings that climb like crazy, producing those iconic white trumpets that only open under moonlight. The vines can reach 15-20 feet in a single season, making them perfect for trellises or fences.
Just be patient—they take 3-4 months from seed to first bloom, but the wait is worth it. Common pitfalls include overwatering (which causes rot) or planting too early (they hate cold soil). If you’re in a cooler climate, start seeds indoors 8-10 weeks before your last frost.
Once established, they’re surprisingly low-maintenance—just keep the soil moist and watch them thrive.
📚 In This Guide
- What you need
- Instructions
- Tips and common mistakes
- Wrapping up and next steps
What you need
- ● Moon flower seed pods: 1–3 fresh, mature pods (harvested just before opening or purchased from a reputable supplier). Pro tip: 💡 Store them in a paper bag in the fridge for 1–2 weeks to mimic natural stratification if they’re not already pre-treated!
- ● Paper towels or coffee filters: 2–3 sheets (cut into 4–6-inch squares for easy handling).
- ● Spray bottle: 8–16 oz (with water) for gentle misting.
- ● Plastic zip-top bag: 1 gallon-sized (or a clear container with a lid).
- ● Small container or tray: 6–8 inches wide (for drainage, like a shallow plastic dish or seedling tray).
- ● Potting mix: 1–2 cups of well-draining, seed-starting mix (or a blend of 50% peat moss + 50% perlite/vermiculite).
- ● Scissors or pruning shears: For opening seed pods (if needed).
- ● Fine-mesh screen or paper towel scraps: To line your tray for easy seedling transfer.
- ○ Heat mat (optional): 70–80°F range to speed up germination (place under the zip-top bag).
- ● Grow lights or sunny windowsill: For seedlings once they sprout (12+ hours of light/day).
- ● Plant labels: To track germination dates (fun for tracking progress!).
How to germinate moon flower seed pods using the cold-moist trick
This method breaks the tough seed coat and boosts germination rates—here's how I do it reliably.
🌱 Step 1: Harvest and Prepare the Seed Pods
Collect mature moon flower seed pods when they've turned brown and begun splitting open naturally. The seeds inside should feel firm to the touch. I like to work with them fresh, but they'll keep in a paper bag for up to 2 weeks if stored in a cool, dry place.
Open the pods carefully—don't crush the seeds—and remove them from the fibrous interior. You'll notice the seeds have a thick, dark outer shell that needs softening before germination. Place them in a clean bowl and cover with lukewarm water for 24 hours. This kickstarts the cold-moist process.
💧 Step 2: Stratify Seeds in Moist Medium
After soaking, drain the seeds and mix them with the moistened peat moss (from your supplies) in a sealed plastic bag. The peat should feel damp like a wrung-out sponge—not dripping, but holding moisture when squeezed. I add about 1 cup of peat moss per 100 seeds to ensure even contact.
Place the sealed bag in your refrigerator, where it will stay at 35-40°F for 4-6 weeks. Check the bag weekly—if the peat feels dry, mist it lightly with water. The cold stratification mimics winter conditions, breaking down the seed's tough outer layer while keeping it hydrated.
☀️ Step 3: Plant Stratified Seeds in Warm Soil
After stratification, fill your seed-starting trays with the warm seed-starting mix (pre-warmed to 70-75°F) and plant the seeds ½ inch deep. Space them 1 inch apart since moon flowers grow quickly. Press the soil gently around each seed to ensure good contact.
Water lightly with a spray bottle to settle the soil without disturbing the seeds. Place the trays in a warm, bright spot (like a sunny windowsill) where temperatures stay above 65°F during the day. Germination should begin in 7-14 days—look for tiny green sprouts pushing through the soil.
🌿 Step 4: Transplant Seedlings Outdoors
Once seedlings have 2-3 sets of true leaves (not just the initial seed leaves), they're ready to move outdoors. Harden them off by placing them in a sheltered spot for 1 hour the first day, gradually increasing time over 5-7 days until they can stay outside all day.
Transplant after the last frost date, spacing plants 3-4 feet apart in well-draining soil. Moon flowers thrive in full sun but appreciate afternoon shade in hot climates. Water deeply at the base after planting to encourage root growth—you'll know they're settled when new leaves appear within 2 weeks.
Tips & tricks for perfect moon flower germination
Here's what I've learned after years of perfecting this cold-moist method—these little details make all the difference.
Seed Selection: Only use seeds from fully mature pods that have naturally started splitting open. Immature pods contain underdeveloped seeds that won't germinate properly. I test seed firmness by gently pressing—if it feels soft or mushy, the pod wasn't ready for harvest.
The Soak Matters: That 24-hour lukewarm water soak is non-negotiable for breaking the tough seed coat. Use water that's warm to the touch (about 90°F) rather than boiling or cold—extreme temperatures can damage the delicate seed structure. I like to cover the bowl with a clean cloth to prevent debris from falling in.
Stratification Consistency: Maintain that 35-40°F refrigerator temperature precisely during the 4-6 week stratification. I place a thermometer inside the bag to monitor—some fridges have temperature fluctuations. If your fridge runs warmer, consider a cooler storage location. The peat should stay consistently damp but never soggy throughout this period.
Transplant Timing: Wait until you see those first true leaves (not the initial seed leaves) before transplanting outdoors. I mark my calendar for the last frost date and add 2 weeks to ensure seedlings are strong enough for the transition. Hardening off gradually prevents transplant shock that could kill young plants.
Pro Tips for Moon Flowers Seed Pods
- Here's what I've learned after years of perfecting this cold-moist method—these little details make all the difference.
- Seed Selection: Only use seeds from fully mature pods that have naturally started splitting open. Immature pods conta...
- The Soak Matters: That 24-hour lukewarm water soak is non-negotiable for breaking the tough seed coat. Use water that...
Frequently asked questions
Got questions about harvesting, storing, or growing moon flower seed pods? You're not alone! Here are some of the most common queries—and their answers—to help you master the cold-moist trick for germination.
When should I harvest moon flower seed pods for planting?
Harvest seed pods when they turn light brown and feel slightly papery to the touch (usually late summer to early fall). Avoid harvesting if pods are still green or have opened naturally—the seeds inside may not be viable. Store them in a cool, dry place until you're ready to stratify them!
How long does the cold-moist stratification process take?
The cold-moist trick typically requires 4–8 weeks in the fridge (34–40°F). Place damp paper towels or peat moss in a sealed bag with the seeds, then check them weekly. If mold appears (yuck!), reduce moisture and retry. Patience pays off—this mimics winter’s natural conditions for germination!
What if my moon flower seeds don’t sprout after stratification?
Don’t panic! Try these fixes:
- Check viability: Test a few seeds in warm water—if they sink, they’re likely still good.
- Adjust moisture: Seeds need consistent dampness, not sogginess. Re-moisten towels if dry.
- Extend stratification: Some seeds need up to 12 weeks—give it more time!
Can I grow moon flowers from seed pods without stratification?
Yes, but germination rates drop dramatically (often <10%). If you skip stratification, soak pods in warm water for 24 hours first, then plant in well-draining soil. For best results, though, always stratify—it’s the secret to those iconic moon-shaped blooms!
How do I store leftover moon flower seed pods long-term?
Store pods in a paper envelope (not plastic!) in a cool, dark place (like a fridge) with a silica gel packet to absorb moisture. Label with the harvest date—viability lasts 2–3 years if kept dry. Avoid humidity to prevent mold or rot!
Wrapping up and next steps
Moon flower seed pods hold a magical trick for germination—cold-moist stratification is your secret weapon! 🌱 With the right materials and patience, you’ll unlock vibrant blooms that light up your garden at night. Whether you’re a seasoned gardener or just starting, this method makes success almost effortless.
Now that you’re armed with knowledge, take the next step—grab those seed pods and give them the cold treatment! Watch as your moon flowers sprout into stunning, luminous plants. Happy planting! 🌙✨