
Lawn
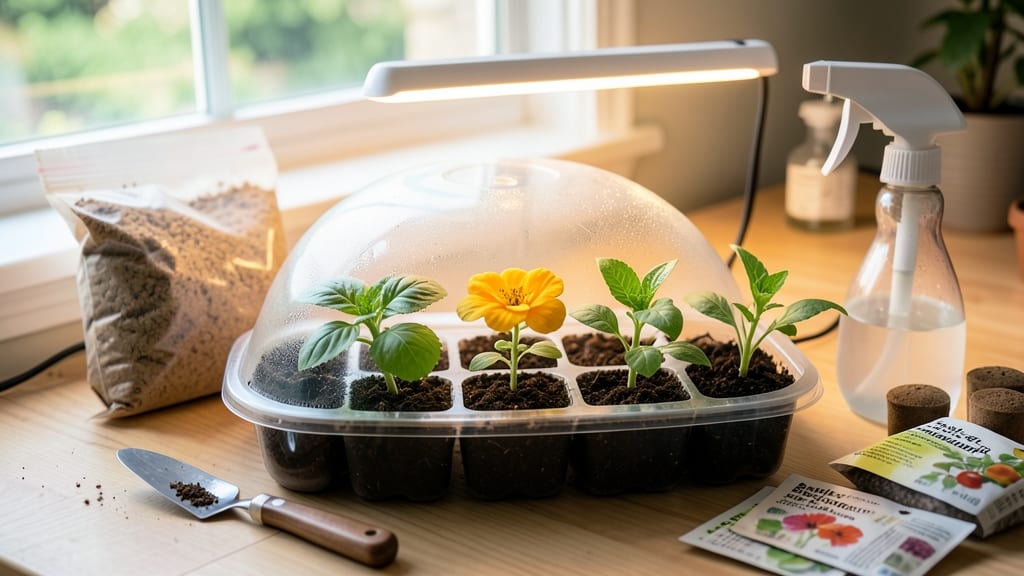
Starting seed trays changed how I begin every growing season—stronger starts mean bigger harvests. 🌱 The right setup keeps seedlings from stretching, rotting, or falling over before they even hit the soil.
My first trays were cheap plastic, but after killing a dozen seedlings, I learned the little details make all the difference. You’ll need seed-starting mix (not garden soil), trays with drainage, and a way to control light—grow lights or a sunny windowsill.
The key is keeping seeds moist but not soggy, and avoiding overcrowding. Too many seedlings compete for light, leaving you with leggy, weak plants that struggle when transplanted. By the time you’re ready to harden off seedlings, they’ll be stocky, dark green, and ready for the garden.
No more sad, stretched-out transplants that wilt within days. The payoff comes when your plants outperform store-bought ones by weeks. This method works for veggies, herbs, and flowers, and even small spaces like apartments. Let’s get those seeds sprouting right!
📚 In This Guide
- What you need
- Instructions
- Tips and common mistakes
- Wrapping up and next steps
What you need
- ● Seed Trays: 1–2 biodegradable or reusable seed trays (10"x20" or 12"x24" recommended for most lawn seeds).
- ○ Optional: Clear plastic domes (1–2) for humidity control (fit snugly over trays).
- ● Growing Medium: 2–3 cups of sterile seed-starting mix (lightweight, peat-based or coco coir blend). ⚠️ Avoid garden soil—it’s too dense!
- ○ Optional: Perlite or vermiculite (¼ cup) for aeration.
- ● Seeds: Lawn seed variety of choice (check packet for spacing guidelines, e.g., ¼" apart for fine fescue).
- ● Basic Tools: 1 fine-mist spray bottle (for hydration).
- ● 1 small hand trowel (for mixing soil).
- ● 1 ruler or measuring tape (for seed spacing).
- ○ Optional Upgrades: Heating mat (for faster germination in cool climates).
- ● Grow lights (12–16 hours/day if natural light is <4–6 hours).
- ● Seedling labels (to track varieties).
- ● Location: Warm spot (65–75°F ideal) with indirect light (or grow lights).
- ● Water Source: Room-temperature water (cold water can shock seeds!).
- ● Patience: Germination times vary—check seed packets for specifics (e.g., 7–21 days).
Step-by-Step instructions for setting up germination-proof seed trays
Here's how I ensure every seedling gets the perfect start—no weak stems or leggy disasters.
🪴 Step 1: Select and Prepare Your Seed Tray
Choose a tray with at least 2-inch deep cells and drainage holes—this prevents waterlogging, which is the #1 killer of new seedlings. I prefer black plastic trays because they absorb heat from sunlight, keeping soil temperatures consistent. Clean the tray thoroughly with a 10% bleach solution and rinse well to remove any residue from previous use.
Line the bottom with a layer of coarse vermiculite or perlite to improve drainage and prevent soil compaction. This layer also helps roots grow downward instead of circling at the bottom of the cell. Press it lightly into the tray so it stays in place but doesn't block drainage holes.
🌱 Step 2: Fill Cells with Lightweight Germination Mix
Fill each cell with a sterile seed-starting mix—never use garden soil, which compacts and suffocates roots. I like to add a handful of sand or perlite to the mix for extra air space. Fill cells to within ¼ inch of the top edge to allow room for seeds and watering without spilling.
Tap the tray gently on the table to settle the mix, then use your finger to create a small dimple in each cell's center. This ensures seeds sit at the ideal depth—usually twice the seed's diameter. A well-prepared tray means seeds won't dry out or get buried too deep, which delays germination.
💧 Step 3: Plant Seeds and Maintain Ideal Moisture
Drop 1-2 seeds per cell into the dimples, pressing lightly to ensure contact with soil. Cover with a thin layer of mix—about ⅛ inch deep—to protect seeds from drying out. Mist the surface with a spray bottle until the top layer looks uniformly damp but not soggy. Overwatering here leads to rot before germination even begins.
Place a clear plastic dome or plastic wrap over the tray to create a greenhouse effect. This traps warmth and humidity, which most seeds need to sprout. Keep the tray in a warm location (70-80°F)—a seedling heat mat works wonders if your home runs cooler. Check daily for condensation on the dome; if it's dry, mist lightly again.
☀️ Step 4: Provide Light and Monitor for Sprouts
As soon as seeds sprout, remove the dome immediately—trapped moisture invites fungal diseases that attack tender seedlings. Move the tray to a bright location with 12-14 hours of light daily. A south-facing window or grow light works best. You'll see true leaves (not just the initial seed leaves) emerge in 7-14 days, depending on the plant.
Keep soil moist but never soggy—water from the bottom by placing the tray in a shallow tray of water for 10-15 minutes. This prevents disturbing delicate seedlings. Watch for leggy growth (long, weak stems), which means your light is too far away or too weak. Adjust immediately to prevent permanent damage.
✂️ Step 5: Thin and Harden Off for Transplant Success
When seedlings have 2-3 true leaves, thin to the strongest plant per cell by snipping the weaker one at soil level with clean scissors. This prevents competition and gives the remaining plant room to grow. I always keep a small spray bottle nearby to mist any exposed roots after thinning.
Start hardening off 10-14 days before transplanting by placing trays outside in a sheltered spot for 1-2 hours daily, gradually increasing time. You'll know they're ready when they tolerate full outdoor conditions without wilting. Transplant on a cloudy day to reduce stress—strong starts mean thriving plants.
Tips & tricks for perfect seed tray setup
These little details make all the difference between wimpy seedlings and sturdy, thriving plants ready for transplant.
Tray Selection Matters: Black plastic trays aren't just a preference—they absorb sunlight and create a microclimate that keeps soil temperatures consistent. If you're using clear plastic instead, place the tray on a dark surface to mimic this effect. The 2-inch depth is critical for root development, so avoid shallow trays that restrict growth.
Soil Preparation Secret: When creating those dimples in Step 2, make them just deep enough to cradle the seeds without burying them. For tiny seeds like lettuce, a simple finger press works, but for larger seeds like beans, use a pencil to create deeper indentations. The goal is to position seeds at twice their diameter below the surface—this ensures they have enough soil contact for moisture while staying close enough to light for germination.
Moisture Balance is Everything: The 10-15 minutes bottom-watering technique in Step 4 is a game-changer for delicate seedlings. Fill a shallow tray with about ½ inch of water and let the tray sit until the top inch of soil feels damp. This method prevents disturbing the seedlings while ensuring even hydration. Watch for condensation on the dome daily—if it's dry, mist lightly with a spray bottle to maintain that critical humidity without drowning the seeds.
Lighting Troubleshooting: Leggy seedlings mean your plants aren't getting enough light, but don't panic. Move the tray closer to your light source or adjust your grow lights to 12-14 hours of daily light. If using a south-facing window, rotate the tray daily so all seedlings get equal exposure. For indoor setups, consider adding a simple LED grow light—it's the difference between weak, stretched plants and compact, sturdy seedlings ready for transplanting.
Pro Tips for Starting Seed Trays
- These little details make all the difference between wimpy seedlings and sturdy, thriving plants ready for transplant.
- Tray Selection Matters: Black plastic trays aren't just a preference—they absorb sunlight and create a microclimate t...
- Soil Preparation Secret: When creating those dimples in Step 2, make them just deep enough to cradle the seeds withou...
Frequently asked questions
Got questions about starting seed trays?
You’re not alone! Here are answers to the most common queries to help you get growing with confidence.
What’s the best time to start seeds in trays?
Timing depends on your plants and climate. For most lawn seeds (like cool-season grasses), start indoors 6–8 weeks before the last frost. Warm-season grasses? Wait until after the last frost. Check your seed packet for specifics—it’s your germination guide!
How often should I water seed trays?
Keep the soil consistently moist but not soggy. Mist lightly every 1–2 days or use a spray bottle to avoid disturbing seeds. Bottom-watering (placing trays in a shallow tray of water) works too—just drain excess after 10 minutes. Overwatering = mold; underwatering = weak sprouts.
Can I reuse seed trays for new batches?
Yes! Clean trays with soapy water and a 10% bleach solution (1 part bleach to 9 parts water) to kill pathogens. Rinse thoroughly and let dry. Avoid plastic trays with cracks—they trap moisture and bacteria. Pro tip: Label trays to track reuse cycles (aim for 2–3 seasons max).
What if my seeds aren’t germinating?
First, check the seed packet for depth/light needs. Common fixes:
- Temperature: Use a heat mat (70–75°F is ideal for most seeds).
- Moisture: Press seeds lightly into damp soil—they need direct contact.
- Light: Some seeds (like lettuce) need darkness to sprout; others (like tomatoes) crave sun.
- Freshness: Old seeds (over 1 year) may fail—test viability by soaking in water.
Are seed trays worth the investment, or can I DIY?
DIY works! Use recycled containers (yogurt cups, egg cartons) with drainage holes, or repurpose shallow dishes. Just ensure they’re sterile and breathable. Store-bought trays (like plastic or biodegradable peat pots) offer convenience, better drainage, and even heating options—but they’re optional for beginners.
Wrapping up and next steps
Starting seeds in trays is a game-changer for any gardener—whether you're a lawn care pro or a beginner with green thumbs. With the right setup, you’ll enjoy faster germination, healthier seedlings, and a head start on your dream garden.
Now that you’re equipped with the best materials and answers to common questions, it’s time to roll up your sleeves and get growing! 🌱
Your next step? Pick your seeds, prep your trays, and dive in! Watch those little sprouts pop up—it’s one of the most rewarding parts of gardening. Happy planting! 🌿