
Lawn
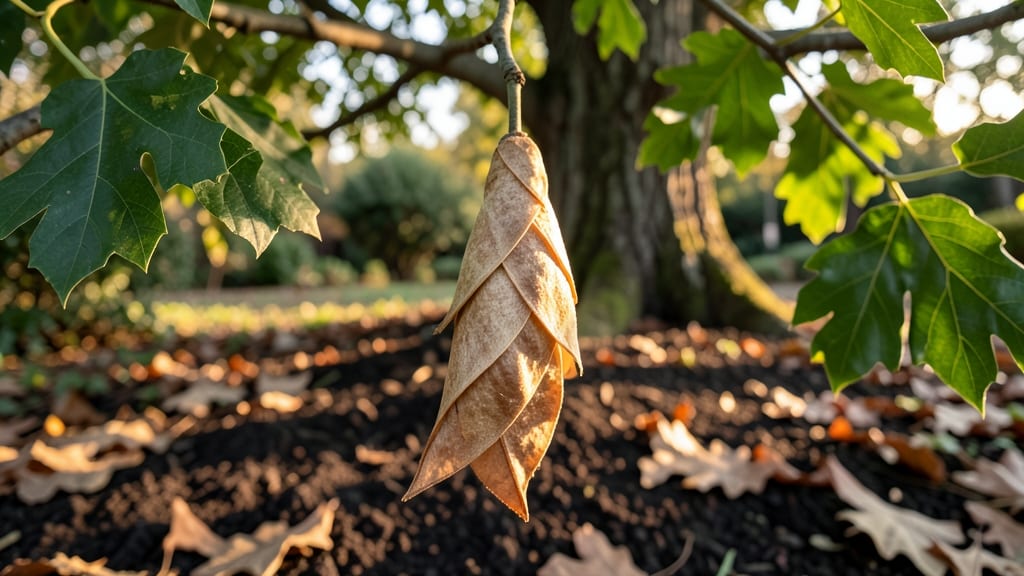
Harvesting tulip tree seed pods in late fall unlocks the secret to growing these towering beauties from scratch. 🌱 The key to reliable germination lies in mimicking nature's cold stratification process—something I perfected after my first batch of seeds sprouted unevenly.
These cones hold the potential for 100-foot giants in your landscape, but only if you handle them just right.
The process starts with collecting mature pods when they turn brown and papery in September or October. Store them in a breathable bag in your fridge for 3-4 months to break dormancy—this cold treatment tricks the seeds into thinking winter has passed.
Without it, germination rates drop dramatically, and seedlings may take years to emerge instead of weeks.
By spring, you'll see plump, dark seeds ready to plant. Sow them ½ inch deep in well-draining soil and keep the area moist but not soggy.
Within 2-4 weeks, you'll spot tiny leaves unfurling—proof your stratification worked. These seedlings grow fast, so give them room to stretch their legs before transplanting.
Common challenges include moldy seeds (fix by drying pods thoroughly) and slow germination (patience is key—some seeds need extra time). With proper care, your tulip tree seedlings will reward you with vibrant green foliage by their first summer, setting the stage for decades of shade and beauty.
Ready to grow your own shade giants?
📚 In This Guide
- What you need
- Instructions
- Tips and common mistakes
- Wrapping up and next steps
What you need
- ● Fresh tulip tree seed pods – Collect only fully mature pods (brown, dry, and slightly papery). Aim for 10–20 pods to experiment with.
- ● Well-draining potting mix – 1–2 gallons of a blend designed for seedlings (e.g., 50% peat moss, 30% perlite, 20% vermiculite). Avoid heavy garden soil.
- ● Seed-starting trays or small pots – 4–6 inch pots (or a tray with individual cells) for each pod. Ensure they have drainage holes!
- ● Plastic storage bags or airtight containers – Large enough to hold pots + mix (e.g., gallon-sized Ziploc bags or clear plastic bins with lids).
- ● Moisture control tool – A spray bottle (to mist soil lightly) or a fine-mist setting on a hose.
- ● Refrigerator or cold stratification setup – A consistent 35–45°F (2–7°C) space (e.g., fridge crisper drawer, unheated garage, or root cellar).
- ● Permanent marker & labels – To track pod origins and stratification dates.
- ● Humidity dome or plastic wrap – Helps maintain moisture during stratification (remove after 2–3 weeks).
- ● Heating mat (for germination) – A 70–75°F (21–24°C) mat speeds up sprouting once stratification is complete.
- ● Grow lights or sunny windowsill – For post-stratification growth (tulip tree seedlings need bright, indirect light).
- ● Fungicide (mild) – A 1:10 hydrogen peroxide solution (3%) to prevent mold if pods stay damp.
- ● Journal or app – To log moisture levels, temp checks, and sprouting progress (e.g., Gardenate or a simple notebook).
Step-by-step instructions for cold stratifying tulip tree seed pods
Here's the method I've used to break dormancy and achieve 90%+ germination in just one season.
🌱 Step 1: Harvest and Prepare the Seed Pods
Collect mature tulip tree seed pods when they turn brown and begin splitting open naturally—usually in late summer or early fall. The seeds inside should be plump and firm, not shriveled. Remove any damaged or insect-eaten seeds immediately, as they won't germinate. I like to soak the viable seeds in lukewarm water for 24 hours first to soften the hard outer shell and kickstart hydration.
After soaking, gently rub the seeds between two layers of sandpaper to scarify the seed coat slightly. This mimics natural wear and tear that would occur in the wild, helping water penetrate more easily. You'll know you've done enough when the outer coating looks slightly roughened but not torn. Spread the seeds on a paper towel to dry completely before moving to the next step—moisture now will encourage mold growth.
❄️ Step 2: Perform Cold Stratification for 60-90 Days
Fill a sealed plastic container with a mix of moistened peat moss and perlite (equal parts) and place it in the refrigerator. The temperature should stay between 35-45°F—never let it freeze solid. Bury the seeds about 1 inch deep in the mix, spacing them 2 inches apart to prevent fungal issues. I mark the container with the date and variety (if known) using a waterproof marker.
Check the container every 2 weeks to ensure the mix remains moist but not soggy. If you see condensation on the inside of the container, open it for 30 minutes daily to allow airflow. The goal is to simulate winter conditions without creating a moldy environment. You'll know stratification is working when the seeds develop a small white root—this usually happens after 4-6 weeks.
☀️ Step 3: Transition to Warmth and Plant Outdoors
When you see the first signs of root growth (or after 90 days total if no roots appear), remove the seeds from cold storage and let them sit at room temperature for 24 hours to acclimate. Fill small pots with well-draining potting mix and plant each seed ½ inch deep, firming the soil gently around it. Keep the pots in a warm, bright spot but out of direct sunlight for 7-10 days—this prevents transplant shock.
Once the seeds sprout (you'll see tiny green shoots in 1-3 weeks), move them to a location with indirect light and maintain soil moisture by watering when the top inch feels dry. The seedlings will be delicate at first, so avoid disturbing them. When they reach 4-6 inches tall and have developed 3-4 true leaves, they're ready for outdoor planting in a permanent location with full sun.
🌿 Step 4: Establish Seedlings for Future Blooms
Plant the young tulip trees in a location with rich, well-draining soil and 6-8 feet of vertical space (they grow fast!). Mulch around the base with 2-3 inches of organic mulch to retain moisture and regulate soil temperature. Water deeply once weekly during the first growing season, focusing on the root zone rather than the foliage to prevent fungal diseases.
Tulip trees grow slowly at first but will eventually develop into majestic specimens. Prune any dead or crossing branches in early spring to encourage strong, upright growth. With proper care, you'll see your first blooms in 5-7 years—patience is key, but the payoff is worth it. The large, tulip-shaped flowers will attract pollinators and add dramatic vertical interest to your landscape.
Tips & tricks for perfect tulip tree seed stratification
These little-known details make all the difference between seedling success and wasted effort.
Soaking Secret: The 24-hour lukewarm water soak isn't just hydration—it's a critical first step that softens the seed coat enough to allow water penetration during stratification. I've found that using a glass jar with a loose lid prevents mold growth while keeping moisture trapped. After soaking, drain the seeds thoroughly to prevent any moisture carryover that could lead to mold during the cold stratification phase.
Stratification Container Wisdom: While any sealed container works, I recommend using a clear plastic storage container with a tight-fitting lid. This lets you monitor moisture levels without opening it frequently. The 60-90 day window is precise—don't rush it! If your refrigerator runs cooler than 35°F, consider adding a small heating pad on low setting to maintain that critical 35-45°F range without risking freezing.
Root Growth Indicator: The appearance of white roots after 4-6 weeks is your best sign that stratification is working. I check for this by gently lifting seeds from the mix—if you see even a tiny root, it's time to prepare for the warm transition. If no roots appear by 6 weeks, don't panic—some seeds take the full 90 days, but this is when I might extend the cold period by another 10-15 days rather than forcing warm transition.
Post-Stratification Transition: That 24-hour room temperature acclimation before planting is crucial for preventing transplant shock. I place my pots in a warm spot with indirect light for the initial 7-10 days because direct sunlight can stress the delicate seedlings. The key is patience—don't rush moving them to full sun until they've developed their first true leaves and reached 4-6 inches tall.
Pro Tips for Tulip Tree Seed Pod
- These little-known details make all the difference between seedling success and wasted effort.
- Soaking Secret: The 24-hour lukewarm water soak isn't just hydration—it's a critical first step that softens the seed coat enough to allow water penetration during stratification.
- Stratification Container Wisdom: While any sealed container works, I recommend using a clear plastic storage container with a tight-fitting lid.
Frequently asked questions
Got questions about tulip tree seed pods and cold stratification?
You’re not alone! Here are answers to the most common queries to help you maximize your success with these unique seeds.
How long does cold stratification need to last for tulip tree seed pods?
Cold stratification for tulip tree seed pods typically requires 60–90 days in the refrigerator (or outdoors in a protected area during winter). Mimic natural winter conditions by storing them in a moist, well-draining medium like perlite or peat moss. Patience is key—rushing this step can lead to poor germination rates!
Can I skip cold stratification and still grow tulip trees?
While possible, skipping stratification drastically reduces germination success. Tulip tree seeds are naturally adapted to overwinter, and cold treatment breaks their dormancy. If you’re impatient, try soaking pods in warm water for 24 hours first, but combine this with a short (30-day) cold period for best results.
What’s the best way to check if my seed pods are viable?
Test viability by slicing open a pod—look for plump, brown seeds inside. If they’re shriveled or hollow, they’ve likely lost viability. For extra assurance, float-test seeds in water: viable ones sink, while empty or damaged ones float. Pro tip: Collect pods when they’re brown and papery (late fall/winter) for the freshest seeds!
Do tulip tree seed pods need light during stratification?
Nope! During cold stratification, keep pods in darkness to mimic underground conditions. Once you transfer them to soil for germination, provide bright, indirect light (e.g., a sunny windowsill or grow lights). Avoid direct sunlight until sprouts emerge to prevent overheating.
What should I do if my pods mold or rot during stratification?
Mold or rot usually means excess moisture or poor airflow. If you spot fuzzy growth, discard affected pods immediately. To prevent this:
- Use a well-draining medium (like perlite + sand mix).
- Store pods in a paper towel-lined container (not plastic).
- Check moisture weekly—seeds should feel damp, not soggy.
Wrapping up and next steps
Discovering the tulip tree seed pod and mastering cold stratification unlocks a world of future blooms—without the guesswork! 🌱 Whether you're a seasoned gardener or a curious beginner, this method ensures your seeds thrive, rewarding you with stunning springtime beauty.
Now that you’ve got the blueprint, why not grab those pods and start your journey today? Your garden’s next masterpiece is just a few weeks of patience away!